Affiliate Disclaimer
Some links in this article are affiliate links. We may earn a small commission if you make a purchase through these links, at no extra cost to you. We only recommend products we find useful to our readersGiving birth is one of the most complex as well as wonderful of all the natural phenomena. It is also one of the most delicate processes of nature. Along with the joy and happiness of expected motherhood, pregnancy also raises several anxiety and fears the following yoga asanas go a long way to not only just keeping you healthy and glowing through your pregnancy! But, also ensuring an early recovery of your former figure and beauty. So here are top 4 yoga poses to lose weight after pregnancy.
Best Yoga Poses For Weight Loss
1Tadasana (Palm Tree Pose)
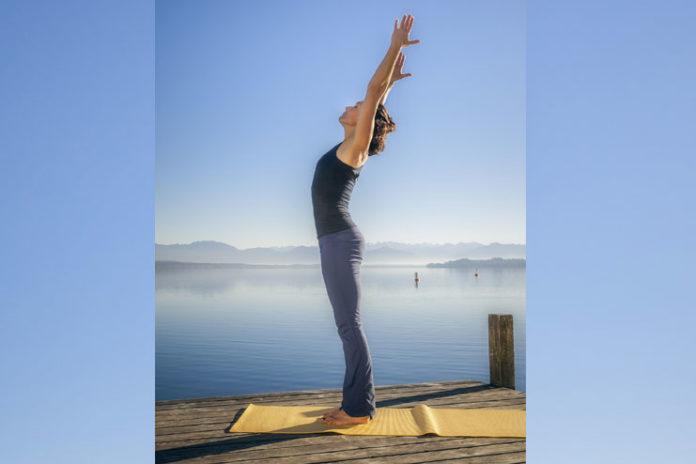
- Stand straight with your feet together.
- Raise your arms moving it sideways, without bending them at the elbows. Straight above your head.
- Unlock your fingers together palms out, raise yourself onto your toes. Hold in this position as long as you can, repeat this position as much as you can.
Note:
- This asana cure back and cervical spondylosis problems.
- Strengthens your back muscles.
- It is also very effective asana for spreading weight reduction.
- As well as strengthening breast and leg muscles.
- Try to perform this asana at least 10 times.
- If you are suffering from low blood pressure, insomnia, and headaches, then perform this asana consulting your physician.
Skip this during pregnancy.
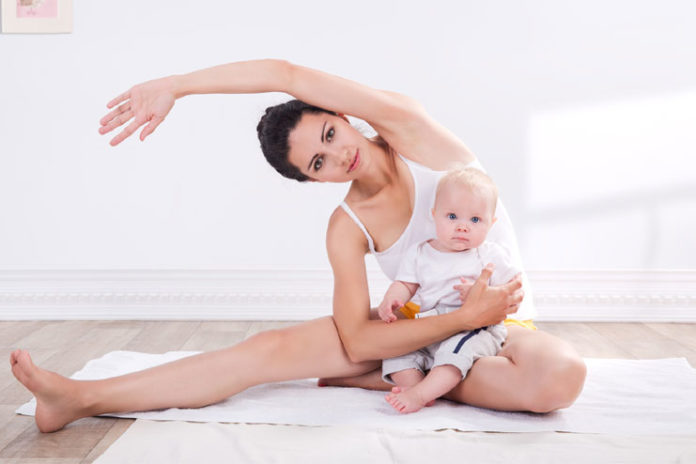
2Triyaktadasana (Swinging Palm Tree Pose)
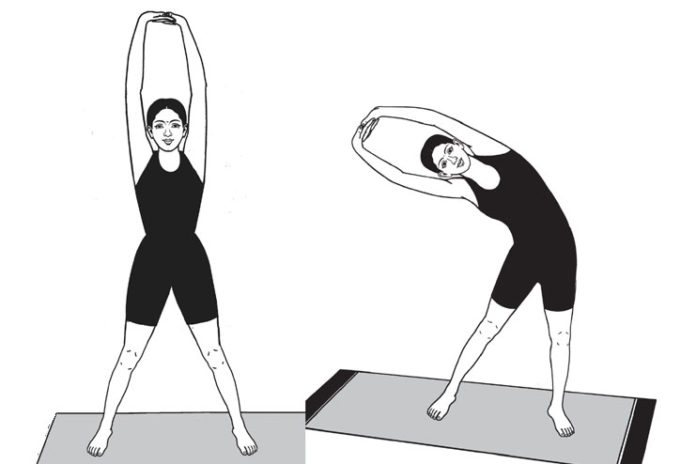
- First stand straight with your feet slightly apart.
- Then, raise your arms moving them sideways, without bending them at the elbows. Straightening above your head and unlock your fingers together, palms out.
- Bend sideways, do not bend forward or backward, hold in this position.
- Then slowly Straighten up and bend to the other side. Repeat this process, and increase the time slowly every day.
Note:
- Reduces fats from the chest and waist.
- Strengthens your back muscles.
- Perform this asana 10 times.
- If suffering from hernia and back pain avoid this asana.
- If you also have pain in the cervix try to avoid this yoga.
3Katichakarasana (Standing Spinal Twist)
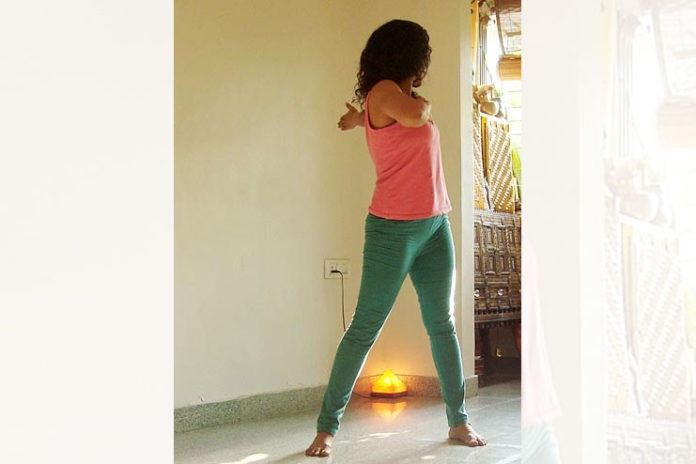
- Stand straight with your feet slightly apart.
- Spread your arms out straight from your shoulders.
- Then turning to your left put your right hand on your left shoulders and your left hand behind your back.
- Twist your body from your back and stay in the position for some time.
- Now, come to the earlier position and repeat the same process on the other side. Slowly try to increase your time every day.
Note:
- Helps in toning arms and the abs.
- It also helps in easing constipation.
- Opens up the neck and shoulder.
- To help in relieving back pain.
- Try to perform this asana 10 times.
- Avoid if you have undergone spinal or abdomen surgery.
- Avoid if you have a hernia, slip disc or abdominal inflammation.
- Also avoid during pregnancy.
4Suryanamaskar (Sun Salutation)
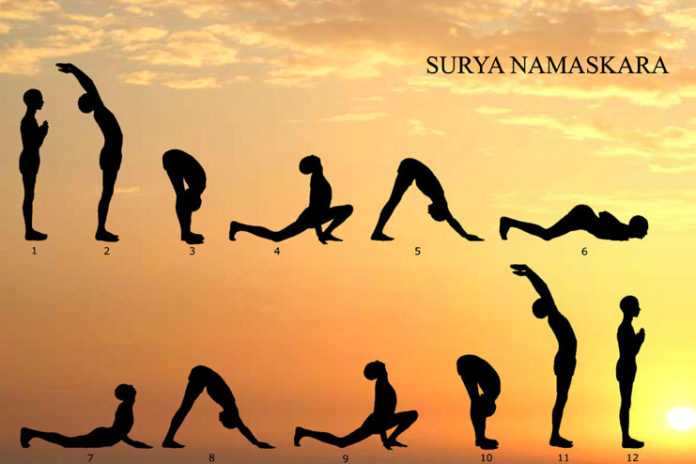
- Stand straight with your feet placed together.
- Then, close your eyes, and relax your mind.
- Now, raise your arms up straight above your head and slowly bend your torso backwards.
- Bend forward and hold your calves with your hands.
- Try to touch your nose to your knees.
- Place your palms flat on the grounds next to your feet and bending your right leg stretch your left leg behind it.
- Now, slowly stretch your upper body backwards.
- Place your palms on the ground, move your right leg backwards to keep both your feet together and put weight on your hands and feet bending yourself in an inverted V. To be in that position for some time.
- Then, slowly try folding your legs and try to touch your nose to your knees, placing your palms where it is.
- Now, stretch your upper body forward and place your chin on the ground between your hand.
- Keeping your elbows flat on the ground. Move your body forward, then upward, placing your weight on your hands. Now, slowly bend your upper body backwards.
- Now raise your body onto your hands and feet, working on inverted V again. Then repeat the previous leg stretching again. Repeat this whole suryanamaskar process again.
Note:
- It is known as the king of all the asanas.
- It exercises almost all parts of the body.
- It also increases blood circulation throughout the body.
- It keeps the heart problem away.
- It improves the functioning of the kidney, the digestive system, and the endocrine glands.
- It also increases the beauty of the face and skin.
- Try to perform this asana 5 times a day.
By –


