


Affiliate Disclaimer
Some links in this article are affiliate links. We may earn a small commission if you make a purchase through these links, at no extra cost to you. We only recommend products we find useful to our readers
For beginners who have just started to apply makeup, eye makeup becomes a difficult task for them. Instead of making a perfect one, they end up smudging the makeup, which cause them a great deal of trouble to the spoiled makeup. Experimenting with makeup is every women’s habit, but only when you have time. When in a hurry all that you want is makeup to finish as soon as possible and you leave for your desired destination. So here, are some tips on how to apply eye makeup, without smudging or spoiling your whole makeup.
Tips On How To Apply Eye Makeup
1Eyeliner
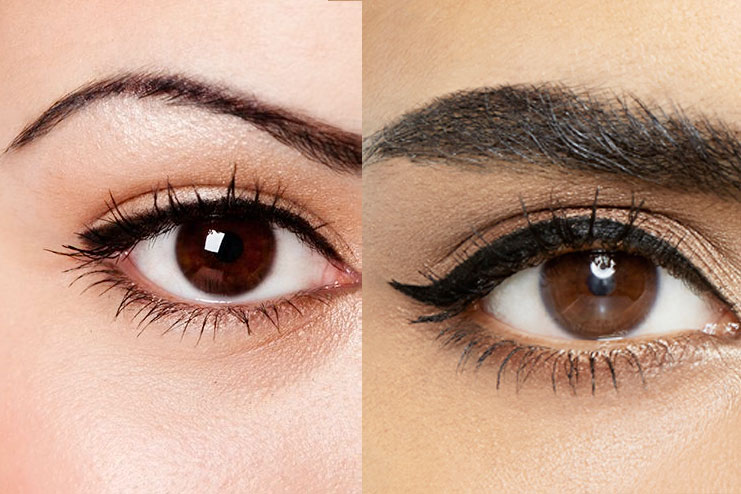
So here you have made a decision to use your liquid eyeliner, but now all you need is to choose from the best application style for yourself. Liquid eyeliner comes from two main types, felt tip as well as dip-brush.
Felt tip eyeliner looks very familiar to a marker, and also has the eyeliner that is fed through like a pen.
Whereas, a dip-brush liquid eyeliner looks like a nail polish and it comes in a small bottle andwith a brush can be dipped in between each of the application.
Prepare your eyelids
Applying liner is basically a middle step, that must be done after you have put on the eye shadow. But before you put your mascara on. First, put on an eyelid primer, that can help the eye shadow or your eyeliner stick to the lid for a whole day. If you are planning on wearing the eye shadow, you can apply it now and then your liner can go over the top.
Get in the right position
One of the biggest problem while applying a liquid eyeliner is just lack of a steady hand, which causes wavy line or sometimes uneven application. To rectify this type of problem, try to rest the elbow on the table and then your hand on the cheek while applying.
If you can, then try to hold a small mirror in the opposite hand instead of using your large mirror. It can give you a good view of the eyelid and the liner application.
Draw a row of dots or dashes
When applying a liquid liner, try to avoid putting it on the single line in one stroke. Doing this can increase the chances of the wavy line as well as an uneven tail end. Instead, you can start by drawing with small dots or even dashes directly to your upper lash line, by evenly spacing them.
Makeup Ideas To Remove Facial Hair Naturally
Connect the dots
Try to use short, small, as well as slow strokes by connecting the dots or the dashes you have created along the lash line. You will also be able to make an even line with both of your eyes that can lack any bumps or even waves by following the method. Try to avoid connecting all of the dots in a single stroke, but use many small strokes in between each of the marks.
Smooth out your line
If you see that the top of the line shows the break in between the dashes, then try to steady the hand and then draw a very thin line along all the edge to smooth out. You can also do so on bottom edge of the eyeliner as well as fill in the space between the eyeliner and the lash line.
Add your tail
Regardless of the types of liner you are using, a small tail must be made at the outer edge of the lid that can give the illusion for continuation of your lash line.Use your liner to draw a small line, which is extending upwards or on the upper lash line, but is also drawn in the same angle as the upwards curve in the lower lash line.Try to draw a small triangle at the end of the line with your upper lash line and then fill the space.
You can now stop the liner early for a more natural look, just sweep it far up from your lid for classic cat eye.
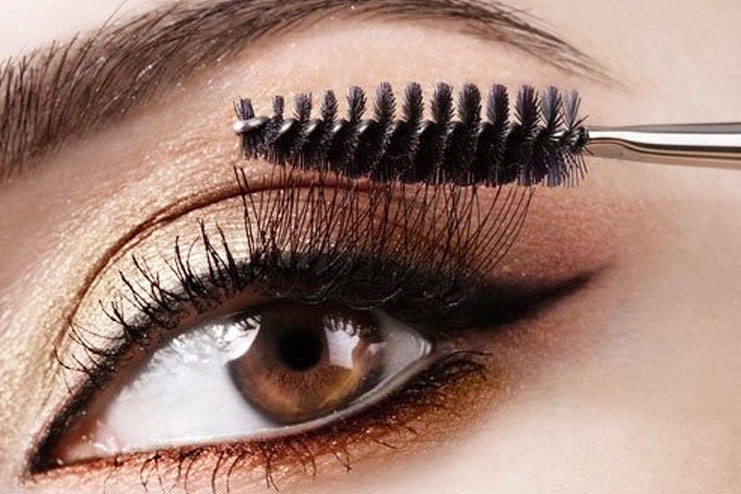
2Mascara
- A mascara
- Primer
- Eyeshadow
- Mascara wand
- Eye liner
- Lash curler
Step 1
- It is very necessary to prep the eyes before you begin the makeup application. Start off with properly cleaned eyes. Grime or Oil can also ruin the look, before you even begun. So be sure to remove all the traces of old makeup, and then follow up with a toner as well as moisturizer.
- An eye shadow primer is very important, it can help in creating a base for the makeup and ensure that the eye shadow lasts long as well as stay crease free. So after the moisturizing, try to apply primer to the eyelids.
Step 2
Try to apply the eye shadow of your choice. To make the lashes look more focused, be sure to stick to a neutral color palette.
Step 3
Now, as you have applied your eye shadow, use the eyeliner to line out the eyes in the way you like. Decide on whether you want to draw a thick or a thin line.Depending on your preference as well as the kind of look that you are planning to go for.
Best Eye Makeup Tips For College Goers
Step 4
Now as it comes to the mascara part. It is very necessary to choose the right type of mascara for your kind of look, that you are going for.
Try to start with curling the lashes with your lash curler. Then place the curler in the base of the upper lashes, now close the curler and then hold it in the same place for few seconds.
Take the tube of the mascara, and swirl the wand around so that you can coat the bristles with the mascara properly. Be sure that you are not pumping the wand into your tube repeatedly. This can push the air in the tube and make the mascara clumpy.
- Start from the roots, then apply the mascara in a wriggling motion. This can ensure that it has more volume in the roots, and the lashes do not feel more weighed down.
- Try to do the same even for your lower lashes. Hence, they are sparser as well as smaller, you can even opt for different mascara, or can even switch it over to the wand that has small bristles.
- If your lashes are sticking together or have clumps of mascara, then you can comb it out with the help of a very clean wand.
- Try to repeat the mascara application by just applying one more coat. This also depends on the volume you are wishing to add to the lashes.
- Then, let the mascara dry for few minutes. Use the lash curler again, for more added curling. This step is just optional. You can go for it, if you are not feeling satisfied with the volume of the mascara can give you.
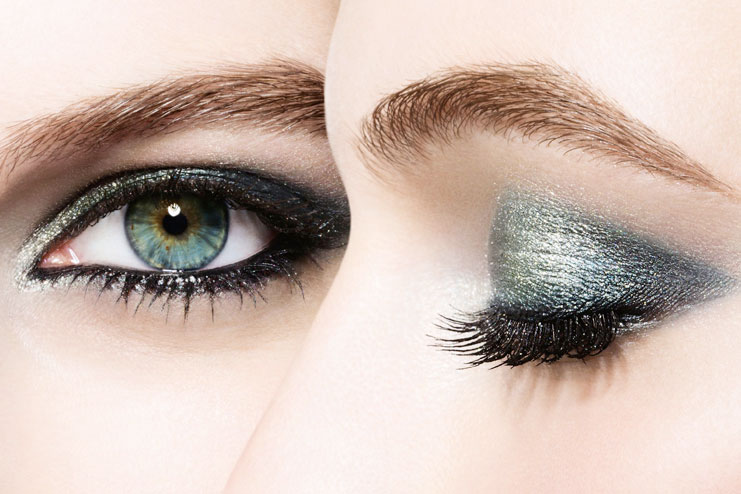
3Eyeshadow
1. Moisturizer
2. Eye primer
3. Eye cream
4. Eyeshadows
5. A kohl pencil
6. Eye makeup brushes
7. A mascara
8. An eyeliner
Types of brushes
- Flat Stiff Brush
This types of brush can be used to apply eyeshadow on your eyelid, as well as under your low lash line. A flat brush is also best for packing the product on the eyelid. You can use MAC 239 which is a great product. This can also work well if you want to apply with glitter pigment as the stiff nature of the brush can help in picking the product easily.
- Pencil Brush
Pencil brush is basically used to apply on the low lash line. This brush is great, when you are smoking out the low lash line, or if you also want to make a soft look. You can use itat the crease to create a very soft crease line. It also work well in the outer corners of the eye where you can add some intensity as well.
- Stiff Dome Brush
This type of brush is perfect to apply, and then blend out the colors. It is also especially useful when using more than just one color and then create a smooth transition without even removing the shade differences.
- Fluffy Dome Brush
A fluffy dome brush is a very good product for blending. It can also help you to achieve, the flawless eyeshadow transition from one shade to other. It can also help to diffuse any kind of harsh lines and make the transition look very smooth.
How To Apply Eyeshadow
Step 1
Prep the whole eye area, as it can be extremely crucial since it is about the base. Then start by cleaning the surrounded area around your eyes. Then follow up with a perfect moisturizer or even an eye cream. Next, try to prep the eye area with a primer, so the makeup can stay for more time and also give a perfect seamless finish. You can also try a concealer that can match your skin tone around the eyes. Then apply your concealer with a brush and then seal it with a transparent powder. This can make the eye area look more even, as well as make the skin more crease proof, also try to conceal any kind of discoloration of your skin. It can also create a clean base, so the colors can sit better.
Step 2
First try to analyze the shape of your eyes and accordingly decide on the makeup technique that can help in enhancing them. The eye consists of an eyelid, the crease, and the brow bone. It is important that you must know which shade or even texture you can use on each of the areas. Always use the textures like the frost or the shimmer or the shine on your eyelid as well as the brow bone, and the matte finish textures on the crease of the eye lid.
Pro Tip
Try to usedarker shadesof eyeshadows that can contour your eyes at your crease and also use more lighter shades at the center of your eyelids to make your eyes pop.
Try to start by applying the color on your eyelid with flat eyeshadow brush, by sweeping or in a patting motion. Try to apply the colors evenly on your lid and deposit more for the intensity.
Step 3
On the crease area, you can use much more dark shade of an eyeshadow to define your eye shape. To achieve it, you can go for shades like deep browns, deep gray, black, dark purple, etc. Start applying on the outer corner of your eye, making a ‘V’, and then blending it halfway through your eyelid with a very fluffy eyeshadow blending brush. Try to do it in a windshield wiper motion. Keep blending it until the color starts to look more softer. In order to highlight your brow bone, go for more lighter shades in either frost or in shimmer textures.
Step 4
If you want to make your eye makeup a little more dramatic, try to use a kohl pencil on your lower lash line. Then, smudge it with a smudger or a pencil, brush if you want more smoky effect.
Pro Tip
Use a white or a beige colored eye pencil on your lower rims of your eyes, as it is the best way to make it look bigger as well as brighter.
Step 5
You can also apply an eyeliner in order to define your eyes. Try to start from outer corner of your eye and then gradually pull inwards using very small strokes.


