Affiliate Disclaimer
Some links in this article are affiliate links. We may earn a small commission if you make a purchase through these links, at no extra cost to you. We only recommend products we find useful to our readersWhat is waterfall braid? The problem is how to get it. These type of braids can be done in order to add more charm as well as beauty to a woman. These beautiful flowing hairstyles can really make your hair look soft and elegant. They can be complex, as there are many varieties of these type of braids. After seeing some you might feel that it is impossible to stay. But, it do stay! So first lets learn the basics of these braid, and later follow the other examples of experimenting with this type of hairstyle.
How To Make A Waterfall Braid
Here, are the ways on how to make different types of waterfall braid:
1. Beginners Way To Waterfall Braid
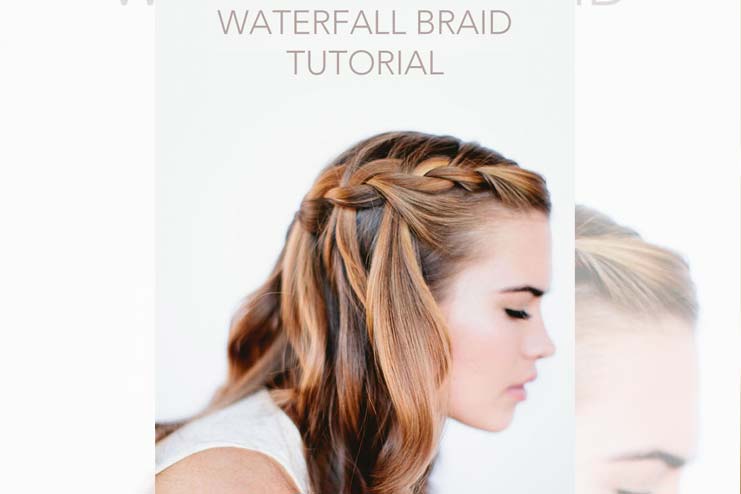
Steps:
- First part your hair on the natural side.
- Then grab small piece from it and divide in three sections.
- Then French braid for about two to three inches. This can secure the “waterfall” and also make sure that it do not fall in the face.
- After you have French braided for few inches, then drop off the top section of the braid.
- It’s ok. Let the hair fall.
- Picking a new section from the hair, directly behind where you might have dropped the top piece. This new piece can act as the new section of the French braid
- Remember to keep moving around the whole head. Every time whenever you grab a section of hair from top of the head to add the braid, let it drop and replace it with another new section.
- When you do reach to the other side of the head, secure the end of this braid with the Bobbi pins.
- This type of waterfall braid can be a little tricky. But practice do make a man perfect.
Extra Tips
– You must brush the hair before you start braiding. Knots as well as tangles do make it very hard for a person to braid your hair. It might also hurt a little!
– A day old hair after shampoo is the best. Little grit is better for the braids as they hold-up much better. Clean hair is just slippery.
2. One-Sided Waterfall Braid
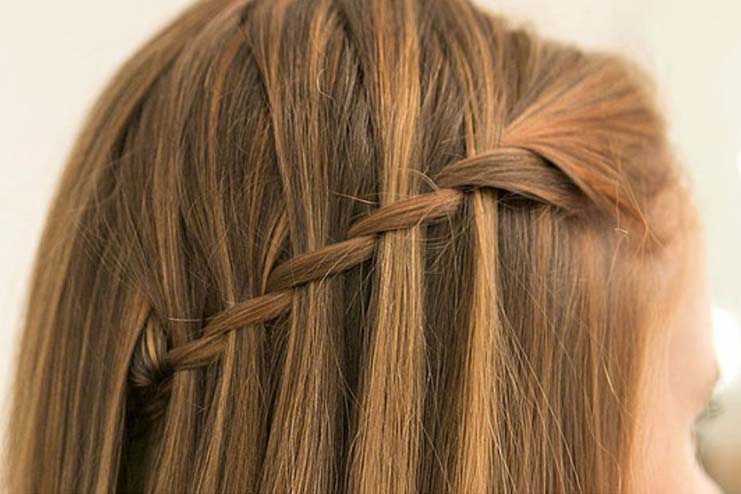
Steps:
- To start the waterfall twist, first take two sections of the hair.
- Then cross this section of the hair along the hairline over other section, so it is going away from the face.
- Taking a new section of the hair from top of the head, let the hair fall on the top section that you just pulled away from the face.
- Dropping the section of a hair that you just placed so that it falls through the twist, creating a waterfall effect.
- Taking the bottom section of the hair, pull it over the waterfall section. Then aging by taking another section of the hair from the top of the head make another waterfall piece.
- Let the piece to fall through the other section of the hair.
- Repeat this process until the waterfall braid is at the length that you want. For this look, just braid one side until it can reach the back of your head.
- Once when reached the end, extend this woven section of the hair with regular three-strand braid and secure it with a elastic.
- To hide the end, tuck the elastic end under the layer in the back of your head. Pinning in a place by crossing the two bobby pins into an X shape.
3. Twisted Waterfall Braid
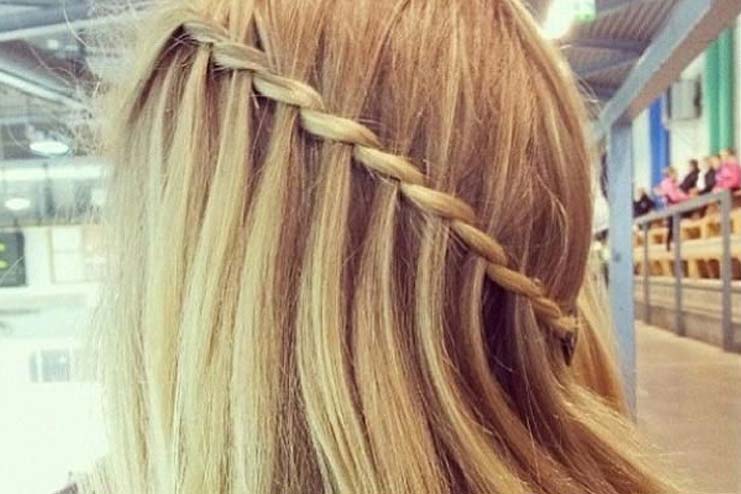
Steps:
- First start with a regular braid, but you drop this top piece through the bottom, leaving it there.
- Gently twist the two pieces you are left with.
- In it add a third piece in between, adding drop the hair through.
- Twisting, repeat the process. Keep on going until you do get on the back. Tie the end with an elastic, under it tuck in the end, securing it with a bobby pin.
- Remember that there are two main steps on this type of braid; twisting, add a new piece.
4. Loop Waterfall Braid
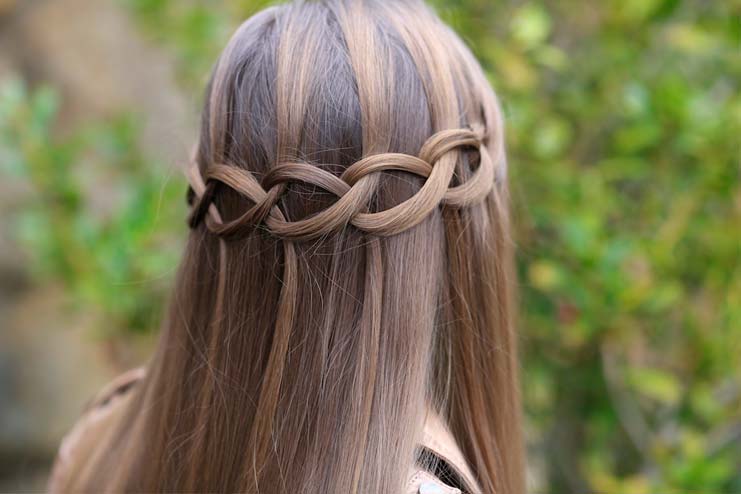
Steps:
- Begin with the hair, parting it in the middle.
- If the hair is looking fine or silky, you can add little bit of wax spray to your hair to add the texture as well as grip, this can help to firm up and help to hold the loops in its place.
- Start about one to one and a half inches back from the front hair, picking up a very decent size section of the hair and wrap it around the pointer as well as middle finger, giving the loop a proper twist counter clockwise in order to create a first perfect loop.
- Keep the two fingers in middle of this loop, pinching as well as falling of the strand of your hair with the thumb against the ring finger.
- With the two fingers, reach for the loop and pick up a same-sized section of the hair, pull them in the half-way through the first loop.
- Twist the hair into a counterclockwise and create a second matching loop.
- Have someone to hold out the fallen strand of the first loop for an extra security as you go on working your way around your head.
- Repeat the steps of four and six all the way across the back.
- Pulling a new strand completely from the loop, let it fall.
- Then, while using two very small bobby pins, pin that loop in its place, be careful to pin it under the falling strand and help it to hide the bobby pins.
- If the loops have completely been stretched out or even have fell out of the shape, then you can easily go back as well as gently adjust the falling of the strands to tighten or even to loosen the loops to a desired look.
- With the first strand that the person is holding, use two bobby pins to pin the first loop in its place just as you also did on other side.
- Add on a setting spray or a hairspray.
- Optional: Try to pull the remaining loose hair in a loose braid or a fishtail to secure it in the ends and help them the style to last the entire day.
5. Sideswept Waterfall Braid
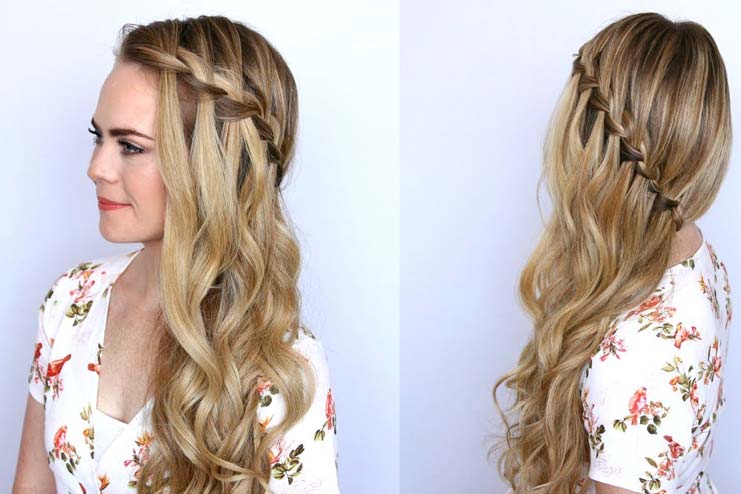
Steps:
- First take a section of the hair at the front of the head; in a sort of triangle shape with the part.
- Crossing the left of the strand over the middle, of the right strand, drop the strand in the left hand.
- Pick up the section of the hair right behind your strand that you dropped.
- Cross the strand that you have picked up over the middle of the strand.
- Continue the steps number two and four by pulling the hair across the back of the head and bringing the braid.
- When the hair from the right side of your head is pulled finish it with a regular braid.
- Then tuck in the braid under the hair and pin in the place.
- Smooth down all the flyaways and curl the ends of the hair for a soft, sideswept finished look.
Styling Tips
– Hold the style: Unless you are having a lot of texture in the hair, this braid can easily slip. Using the hair powder or the hair spray keep the braid in its place.
– Shine on: For a more formal look, use a shine spray. Just the spritz on the end.
Here is the video on more different types of waterfall braid hairstyles:

