


Affiliate Disclaimer
Some links in this article are affiliate links. We may earn a small commission if you make a purchase through these links, at no extra cost to you. We only recommend products we find useful to our readers
In fashion world, several designs keep trending and ruling. The heart stealing designs go the long way in fashion. This is also applicable to smaller part of fashion and beauty. Here are the latest Marble Nail Art designs for every teen girl must have them!
Fashionable women love to explore their interest and be updated with fashion. Exploring all around the fashion, you create and develop the designs. That nail art is explored with designs and colors. One of the ruling styles of nail art is marble.
Marble nail art is learned, experimented and loved by fashionable women. Today, we are sharing the simple way of doing marble nail art and the variety of trending marble nail art designs.
Top Marble Nail Art Designs
1. Ombre marble nail art
Ombre marble nail art is blend of two colours. The uneven blend of two colours makes an ombre nail art. Ombre nail art in marble style is classy. The colours you choose to blend must be of trending combination.
Ombre marble nail art is a must try for special occasions. The fancy outfits and ombre nail art makes you look super fashionable. This style of suits all kind of nail shapes.
You need
Base coat nail polish
Two nail gels
Toothpick
Glitter flakes (optional)
Top coat nail gel
Steps to do
1.Give your nails a nude colour base coat.
2.Once the base coat is dry, add two nail gels.
3.Half blend the colours with a toothpick.
4.You can add glitter flakes when the gel is still wet.
5.Let it dry and give a top coat.
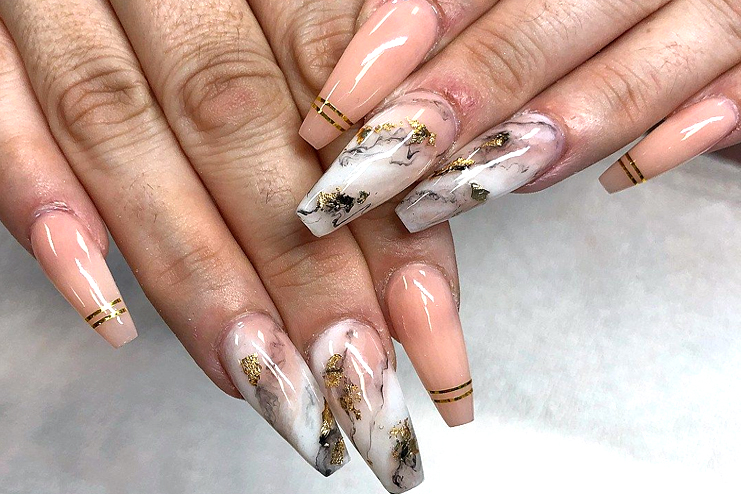
2. Marble nail art with a strip
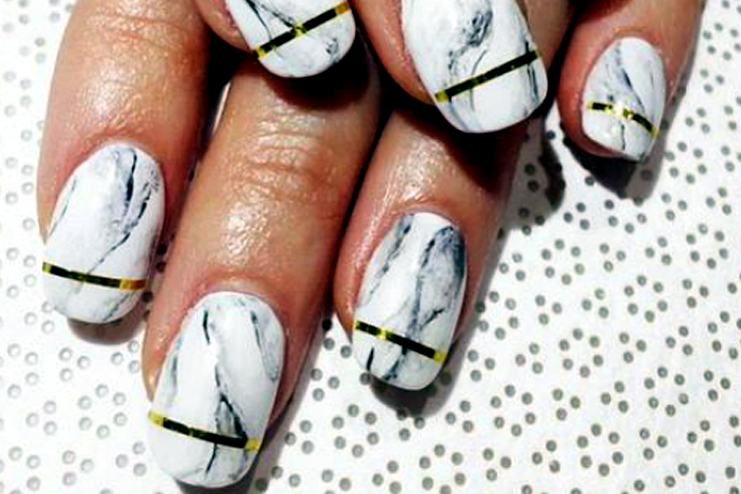
Strips are adding the beauty to all kind of nail art designs. Strips in nail art enhance the look of marble nail art. Some shiny strips can make your nail art attractive.
When you feel these, you need some classy touch, stick a golden strip. There you will get a super nice marble nail art.
You need
Base coat
Any two nail polish colours
Golden nail strips
Top coat
Steps to do
1.Take two nail polish colours and spill the drops on a sheet.
2.Blend the polishes with a sharp tip tool.
3.Make the polish into a patch.
4.Create 5 nail polish patches for every finger.
5.Let the blended nail polish dry.
6.Cover your nails with base coat and stick the nail polish patch on your nails.
7.Remove the extra patch and fit in as per your nail shape.
8.Stick the strip over the nail polish patch.
9.Seal strip with a top coat.
10.Let it dry.
3. Black and white marble nail art
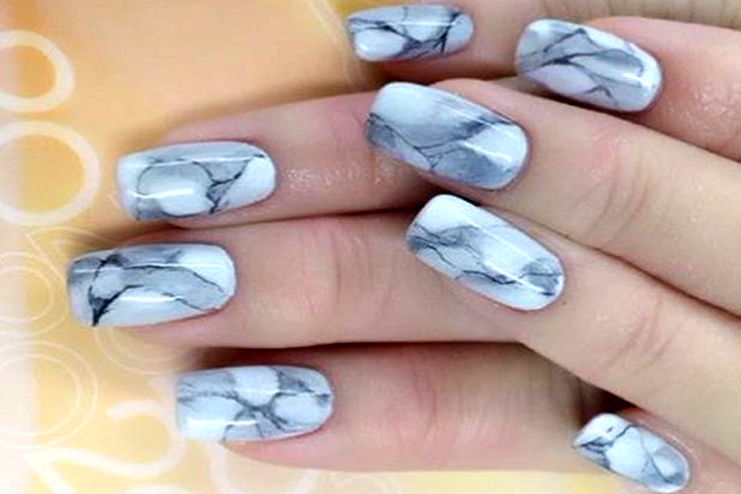
When black and white combo failed in fashion history? This casual but stunning blend of black and white nail art is the coolest idea. Be it a routine blend of colours, it works uniquely for marble nail art.
The combination of black and white turns into grey with nail art. This is a nail art which can go with any western or semi western outfit.
You need
Base coat
Black nail polish
white nail posh
Toothpick
Top coat
Steps to do
1.Give your nails a clean base coat.
2.Make a nail polish patch blending black and white nail polish.
3.Let the nail polish patch dry.
4.Stick this nail polish patch to your nails.
5.Cut off the extra patch and add a top coat.
6.Let the art dry.
4. French marble nail art
French nail art is a quirky design for every modern lady. The nails covering partly with marble design makes the nails look stylish. You can choose various colours and designs to make French nail art.
French marble nail art looks pretty on long nails and stylish on short nails. For coming special appearance, try doing French nail art.
You need
Base coat
Any 2 Nail polish colours
Nail tape
Top coat
Steps to do
1.Cover your cuticle part with the nail tape.
2.Apply the base coat nail polish on other part of the nails.
3.Add few drops of nail polish colours and blend with toothpick.
4.You can create your favourite design.
5.Let it dry and then apply a top coat to all your nails.
5. Glitter marble nail art
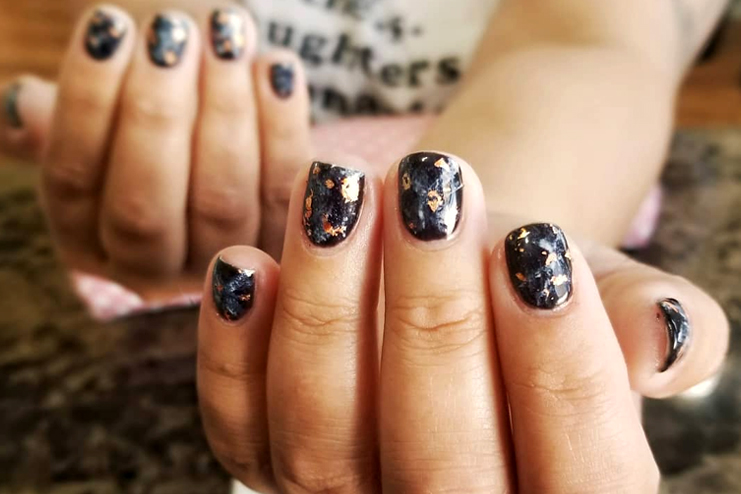
Marble nail art with glitter is all stunning. The little shine can style your nails The blend of nail colours and glitters are trending in every nail art style. So, don’t miss it for nail art.
Marble nail with glitter can be with glitter flakes and sprinkles. It is simple to let your nails shine out with glitters. This going to grab huge attention and much suitable for grand outfits. An outstanding nail art for an outstanding appearance.
You need
Base coat
Any 2 Nail polish colours
Piece of sponge
Glitter flakes
Top coat
Steps to do
1.Apply the two nail polish colours on the sponge.
2.Dab the sponge on your nails.
3.Remove the scattered nail polish off your nails.
4.Apply a top coat of gel to your nails.
5.Add glitter flakes to your nails with a sharp nail tool.
6.You can also sprinkle glitter powder.
7.Add a top coat over the nail art and let it dry.
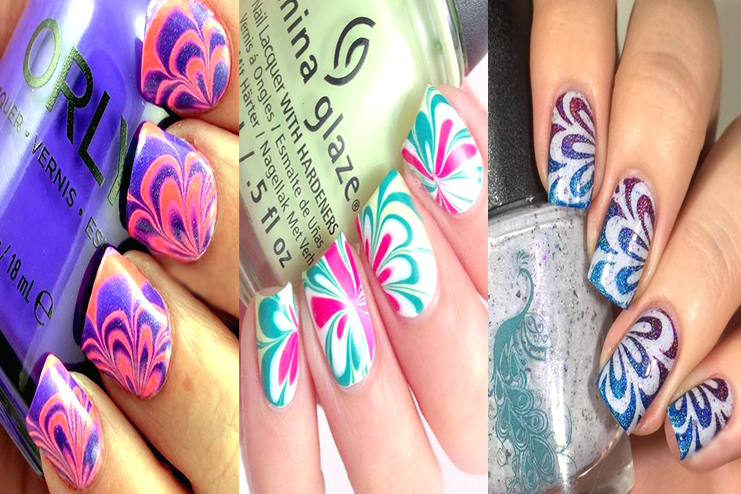
6. Multi colour marble nail art

Multi colour designs have the next level craze in nail art. When colours can make magics coming together, why to keep them alone. Let your nails look stylish with the mixture of colours.
You can take the bright or pastel colours and make a multi colour marble nail art. The style tip for this nail art, is to choose bright colours. The bright colours blend creates the unbeatable fashion shades. It will be a chic nail art like it is shown in the above image.
You need
Base coat
3-4 Nail polish colours
Ear buds
Top coat
Steps to do
1.Apply a base coat to your nails.
2.Take every colour and dot it on your nails.
3.Keep dotting until the nail is covered with colour.
4.Create the marble effect with the ear buds.
5.Add a top coat and let it dry.
7. Cane candy marble nail art

Candy is eye catchy with the colours and sweet in taste! Forget the taste when it is candy marble nail art but look at the nails. The bright colours can decorate your nails with sassy style.
Funky college going girls will love try such nail art. You can wear candy nail art casually. It is much like playing with colours splashing on your nails. Just take the colours and slap on your nails for candy nail art.
You need
Base coat
Nail polish colours
(Any candy colours)
Sharp nail tool/dotted nail tool
Top coat
Steps to do
1.Apply base coat to your nails.
2.Let the base coat dry.
3.Then spill the drops of nail polish colours on the nails.
4.Take a toothpick or sharp nail tool and blend the colours.
5.Cover your nails with a clean top coat.
6.Let the art dry.
8. Flower marble nail art
Never flowers and nail art can stay away. The flower designs in nail art cannot be missed. Giving a lovely twist and turn to the nail colours, you can make this flower marble nail art.
You don’t have to create a flower design. The colours and the twists can easily make the design flowery.
Keep your hands twisty and just let the curves do the magic to create this lovely nail art. This is a nail art that you can make for every special appearance. This is also super cool for casual go.
You need
Base coat
Nail polish gels
Toothpick
Top coat
Steps to do
1.Create a nail polish patch with the blend of nail gels.
2.Make flower design while mixing the nail gels.
3.Let the nail polish patch dry.
4.Mean while apply base coat to your clean nails.
5.Then take the dried nail polish patch and stick to your nails.
6.Cut off the extra nail polish patch and apply a top coat over it.
7.Let it dry.
9. Spiral marble nail art
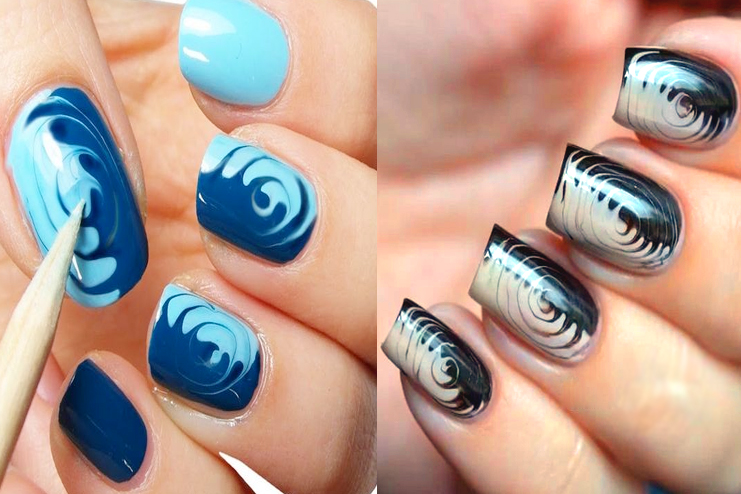
Spiral nail art is a easy to do nail art. But it looks highly attractive. When the colours blend and swirl cannot stop catching eyes. The spiral nail art is that eye catchy.
You can add multiple and contrast colours for this nail art. You will love playing with colours and your play is going to be worth the spent time. This is a fashionable nail art that you try hands on.
You need
Base coat
Nail polish colours
Nail tool
Top coat
Steps to do
1.Apply a base coat to your nails.
2.Spill drops on nail polish colours on your nails.
3.Take a toothpick and make spiral design with the nail polish.
4.Let the applied nail polish dry.
5.Apply a top coat and let it dry.
10. Embellished marble nail art
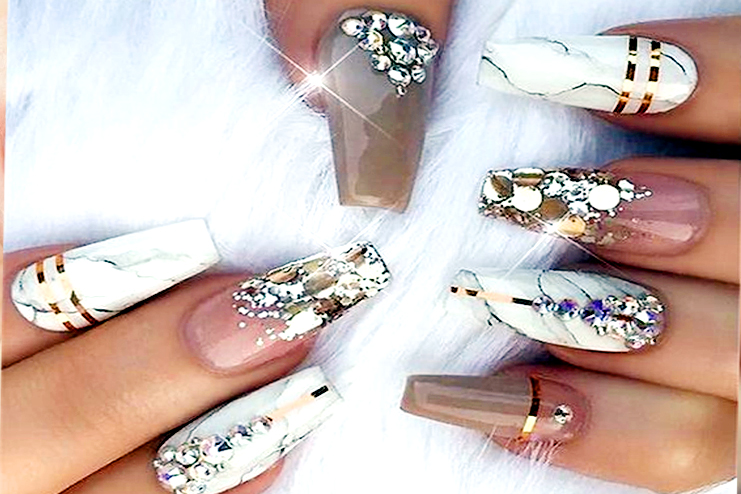
Embellishments make the nail art look great and traditional. This nail art is perfect for Indian ethnic outfits. This nail art also suits bridal nails as it looks grand with the embellishments.
The embellished nail art looks pretty with the pastel colours. You can think even more creative and try it with vibrant colours. A special outfit would go well with this super special nail art.
You need
Base coat
Nail polish colours
Toothpick
Embellishments (Rhinestones, sequins)
Sharp nail tool
Steps to do
1.Apply a base coat to your nails and let it dry.
2.Apply nail polish gels to your nails in dot size.
3.Then blend the nail polishes with a toothpick.
4.Let the applied polish dry.
5.Attach the embellishments on your nails with the help of nail tool.
6.Then seal the nail art with a layer of top coat.
7.Let the art dry.
As you have the marble nail art designs and steps to do, keep trying all of them. Colours are magical and the marble nail art will prove it again when you try. It is fashionable and fun to do nail art.
Related Articles:
8 Easy and Amazing Nail Arts You Must Try
Nail Art Technique Using A Sponge For Beginners
12 Genius Ways to Paint Your Nails Perfectly – Beauty With Tricks


